How to use Canva Bulk Create (and when to automate it)
Canva Bulk Create turns a table into up to 300 designs at once. Here's how to use it step by step, its limits, and how to automate the same design when you outgrow it.
TL;DR:
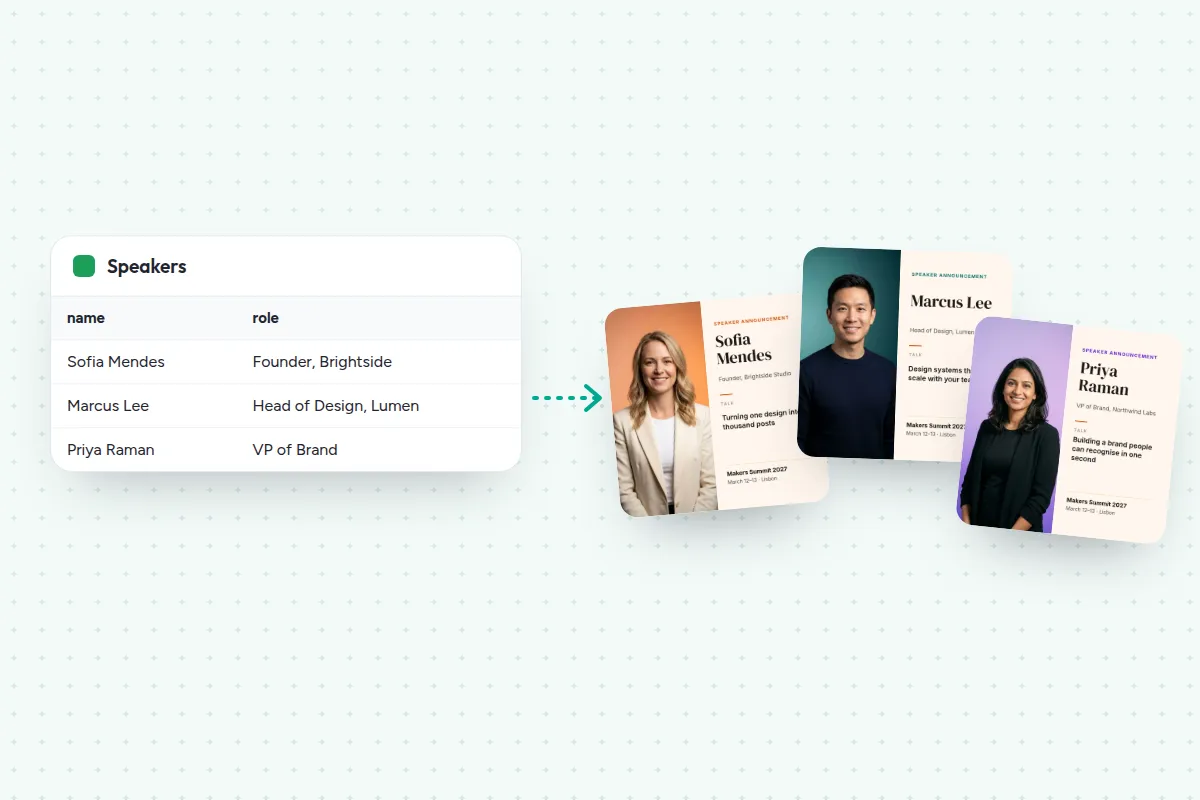
Canva Bulk Create turns a table of data into many versions of one design: one design for each row, up to 300 rows at a time. It comes with Canva’s paid plans, and you run it by hand each time.
- Give each part that changes its own text box or frame
- Open Bulk create, then upload a CSV or XLSX file or type the data in
- Match each field to the design, preview it, and create the designs
- Image links don’t work: photos must come from Canva or be embedded in the file
- To run the same design on a schedule or from new rows, import it into JamFrame
You have one design and 40 versions to make: a name on each certificate, a speaker on each card, a product on each post. Copying the page 40 times and retyping each one takes an afternoon, and one typo ruins the batch. Canva Bulk Create does that job for you.
It’s Canva’s version of a mail merge (some people call it the Canva mail merge): you make the design once, add a table of data, and Canva makes one design for each row.
This guide shows how to use Canva Bulk Create step by step, where its limits are, and what to do when you need the same designs made automatically.
What you’ll make
Five speaker cards for a conference, Makers Summit 2027, one for each speaker, from one design and one table:
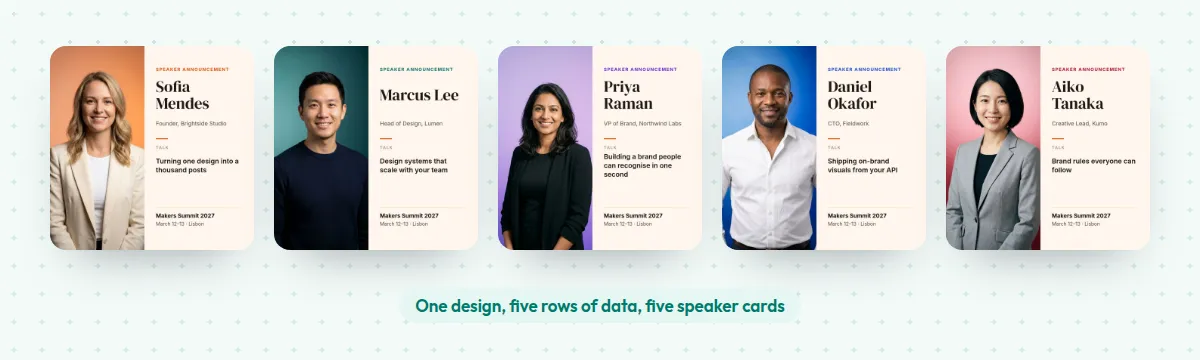
Each card has the speaker’s photo, name, role and talk. The layout, fonts and colors stay the same on all five.
What you need
- A paid Canva plan. Bulk Create is on Canva Pro, Teams, Business, Enterprise, Education and Nonprofit, on the web and the desktop app (Canva Help Center). Canva Pro costs US$144 a year for one person (Canva pricing). It isn’t on Canva Free.
- A design to fill in.
- Your data: a CSV or XLSX file, a Canva Sheet, or a table you type in.
1. Prepare the design
Make one speaker card the way you want every card to look. Then check that each part that changes is its own element:
- Each text field needs its own text box. Put the name, the role and the talk in three separate boxes, not one.
- Each photo needs a frame or a grid. Canva fills the frame with each row’s photo and crops it to fit.
- Each page needs its own fields. In a design with several pages, connect the data on every page.
Everything else, like the event name and the background, stays as you designed it.
2. Add your data
Open Bulk Create in one of two ways:
- Click the page background, select Edit in the toolbar, then Bulk create.
- Or open Apps in the side panel and, under More from Canva, select Bulk create.
Under Choose a starting point, pick Bulk Create. Then add your data, one column per field and one row per design:
- Upload data: a CSV or XLSX file. If your data is in Google Sheets, download it first with File → Download.
- Enter data manually: type the table in, with Add text, Add image and + Add row.
- A Canva Sheet: select the rows, then Actions → Bulk Create.
You can use up to 300 rows at a time.
Tip: Canva treats image links as plain text, so a photo column of URLs won’t work. Add each photo with Add image from your Canva uploads, or embed the photos in an XLSX file or a Canva Sheet (Canva Help Center).
3. Match the fields to the design
Select Match and fill fields. Canva matches the fields it can to elements in your design. To change a match, select the element, choose Match data in the toolbar, and pick the field under Connect data.
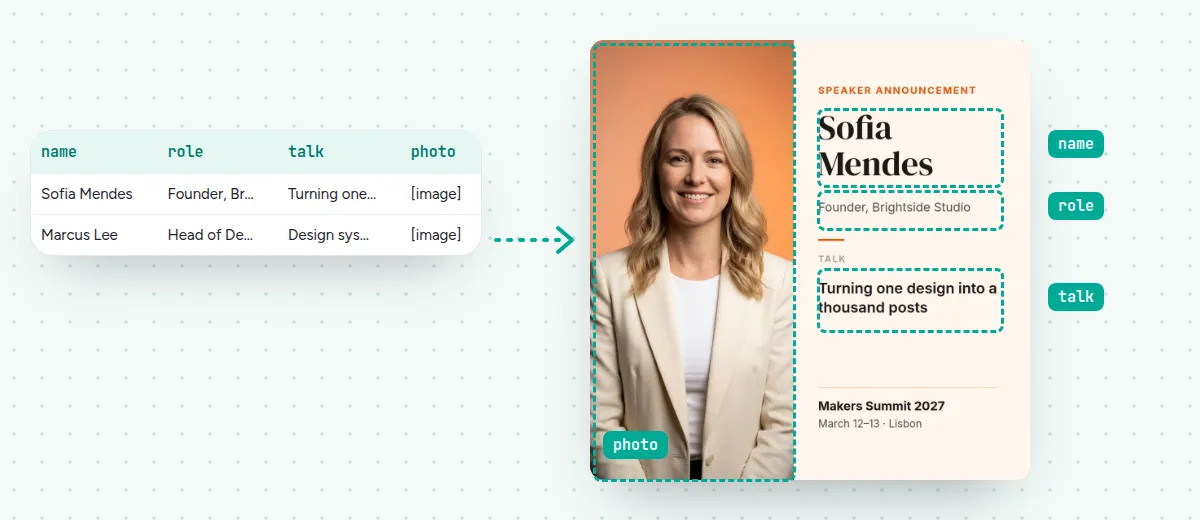
Then select Preview and step through a few rows. Look for long names that wrap onto a new line and photos cropped in the wrong place.
4. Create the designs
Before you create them, select the ••• next to Create designs and choose the Output:
- 1 design with multiple pages: one design, with a page for each row. Easy to download as one PDF.
- Individual designs: a separate design for each row. Easier to share or post one at a time.
Then select Create 5 designs. The number matches your rows. Canva saves them to your projects.
To download them, select Share, then Download, and choose a file type. Several pages as separate images come as one ZIP file.
That’s it. For a small batch like this, most of the time goes into the table.
What Canva Bulk Create does well
- It’s quick for a one-off batch. Certificates for a workshop, name badges for an event, cards for a product launch: from table to finished designs in minutes.
- You stay in Canva, with its photos, fonts, templates and your team.
- It comes with plans many teams already pay for.
If you make a batch now and then, by hand, Bulk Create is the right tool.
When you outgrow Canva Bulk Create
Bulk Create runs only when you run it. That starts to hurt when:
- The data keeps changing. Speakers confirm over weeks. Each new one means another upload and another batch.
- You make the same batch every week, such as menu specials or product posts.
- Your photos live at links, in a form, a CMS or a product feed. Bulk Create can’t use image links.
- The designs need to go somewhere, like a LinkedIn post, a Slack channel or your own app, without anyone downloading them.
There are two ways to automate a Canva design:
- Canva’s Autofill API fills Canva designs from your own code. Since September 2026 it works for apps acting for users on Canva Pro and Teams as well as Enterprise (Canva developers). It’s built for developers: you make a Canva app, sign users in, start autofill jobs and export the results.
- JamFrame imports the design from its Canva link, then fills it from a sheet, the API or an AI assistant, and can post the results. No developer needed.
How to automate your Canva design with JamFrame
Share the design in Canva
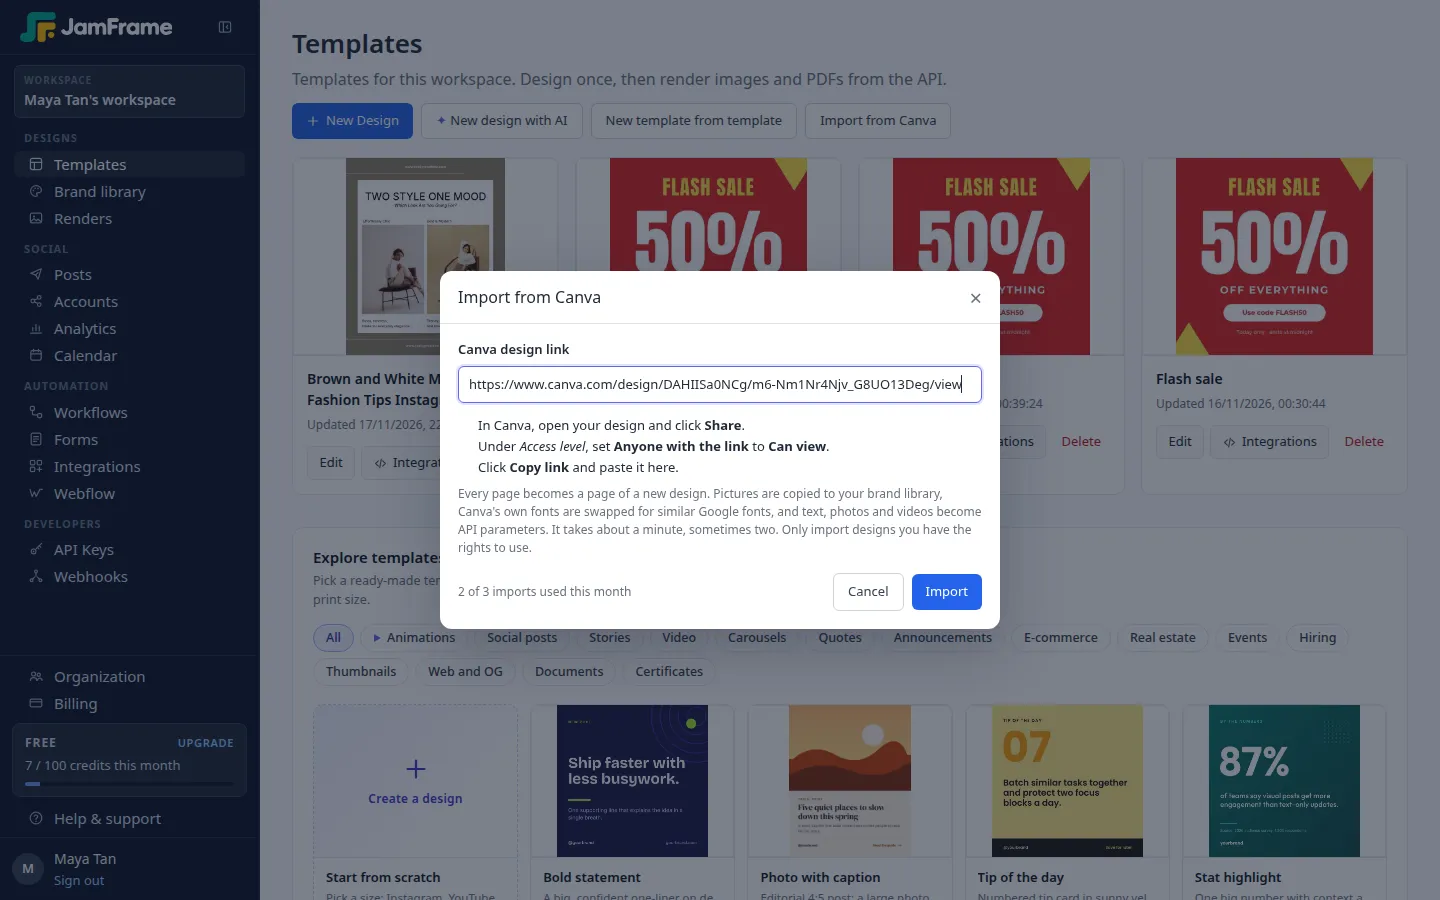
In Canva, click Share, set Anyone with the link to Can view, and click Copy link. Every Canva plan can do this, Canva Free too.
Import it
In JamFrame, open Templates and click Import from Canva. Paste the link into Canva design link and click Import. It takes about a minute.
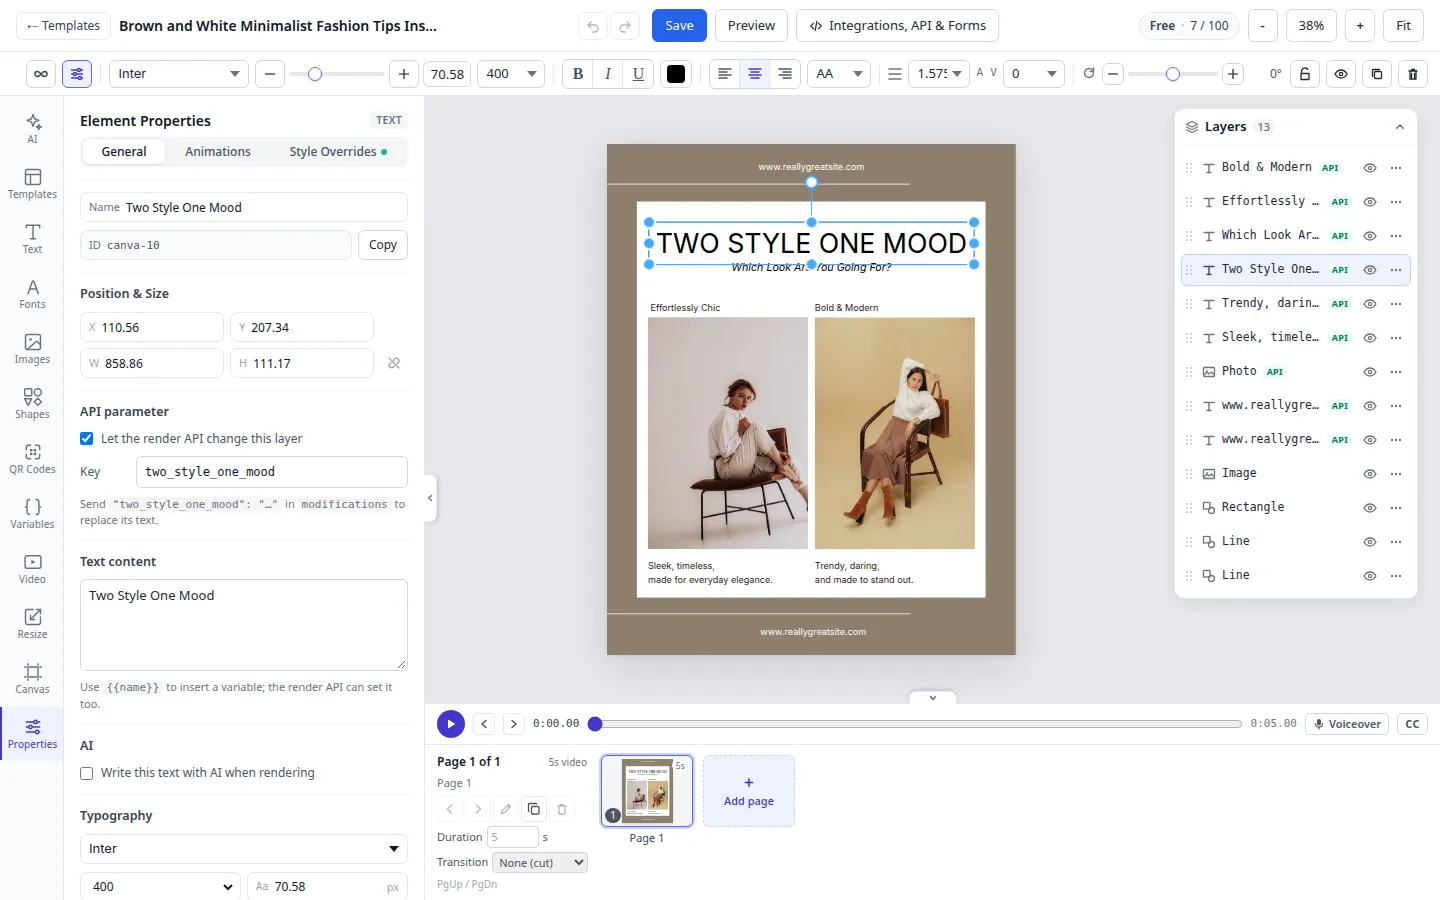
Text, photos and videos come across as fields, each with a key: the short name a sheet column fills. Canva’s own fonts, like Canva Sans, are swapped for a similar Google font, and the import tells you which ones.
Rename the keys
The import names text fields after their first words, so “Sofia Mendes” becomes sofia_mendes. Rename them to match your columns: select the layer, and change the key under API parameter in Element Properties. Use name, role and talk. The photo is already photo.
Fill it from a sheet
Put your speakers in a Google Sheet, with a photo column of image links (here they work) and a status column. Then build a workflow that renders each speaker marked Confirmed and posts the card:
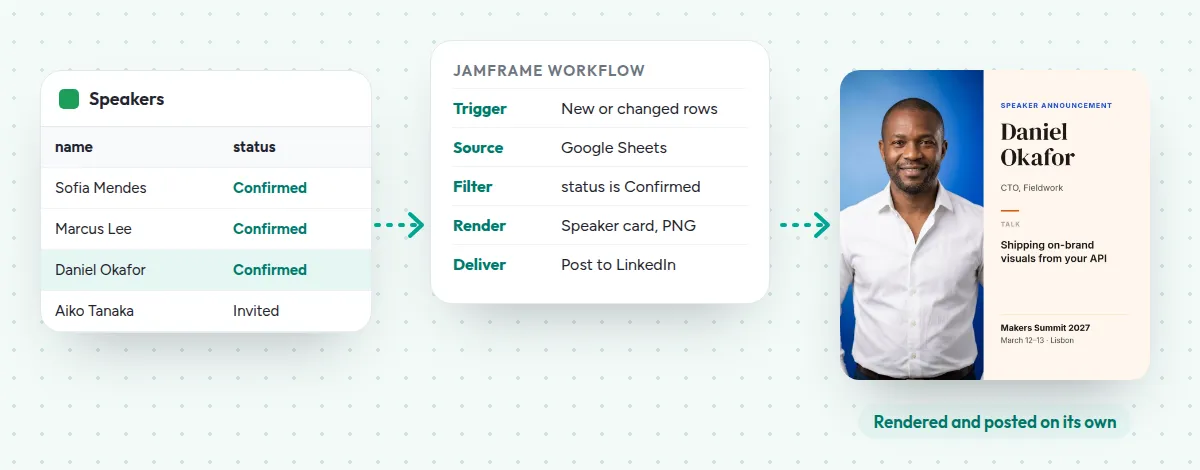
Now, when you mark a new speaker Confirmed, the workflow’s next check makes their card and posts it. Set it to check every hour, and that’s within the hour. JamFrame posts directly to LinkedIn and Bluesky, and to Instagram, Facebook and other networks through Buffer. Every step is in our guide to automating posts from a Google Sheet.
Prefer to fill it from your own app? The same template takes a JSON request to the JamFrame API, one call per card. See Canva automation.
What it costs
- Canva Bulk Create comes with Canva’s paid plans, such as Pro at US$144 a year.
- JamFrame’s Free plan includes 3 Canva imports and 100 render credits a month. Each card uses one credit, so five speaker cards use 5. Paid plans have no limit on imports.
- Failed renders and posting are free.
When to use which
| You need | Use |
|---|---|
| A batch now and then, made by hand | Canva Bulk Create |
| Your own app that fills Canva designs | Canva’s Autofill API |
| The same design, filled automatically from a sheet and posted | JamFrame |
For a side-by-side of the two, see JamFrame vs Canva Bulk Create. Making certificates? Try one in the free certificate maker, no sign-up needed.
Start free with 100 credits a month.
Keep reading
Best video editing APIs in 2026: 6 compared
The best video editing APIs in 2026: Shotstack, JSON2Video, Creatomate, Plainly, Remotion and JamFrame, with free plans, what a minute of video costs and what each is best for.
APIBest PDF generator APIs in 2026: 11 compared
The best PDF generator APIs in 2026: HTML to PDF APIs like PDFShift and DocRaptor, and template APIs like CraftMyPDF and PDFMonkey, with free tiers and prices checked on each site.