
Use JamFrame with Webflow
Give every item in a Webflow CMS collection its own image, made from a JamFrame template and saved to an Image field. Connect your site, add a collection, and new and changed items get their image automatically.
The Webflow app makes an image for each item in a Webflow CMS collection: a share image (Open Graph) for every blog post, a card for every team member, a thumbnail for every product. You pick a template and say which item field fills each part of it. JamFrame saves each image to an Image field of its item, and makes a new one when you add or change an item.
What you need
- A Webflow site with a CMS collection, such as a blog.
- An Image field in that collection for JamFrame to fill. Use a field of its own, such as “Open Graph Image”, so JamFrame never replaces your own pictures. To add one in Webflow: open the site in the Designer, click CMS, open the collection’s Settings, click Add Field, choose Image, name it, and click Save Collection.
- A template in JamFrame with fields to fill, such as a title and a photo. See Create a template.
- Editor access to the JamFrame workspace. Viewers can see the Webflow page but can’t change anything.
Connect Webflow
-
In JamFrame, in the sidebar, under Automation, click Webflow.
-
Click Connect Webflow. Webflow’s own screen opens.
-
Tick the sites to share with JamFrame (or a whole Workspace), then click Authorize App.
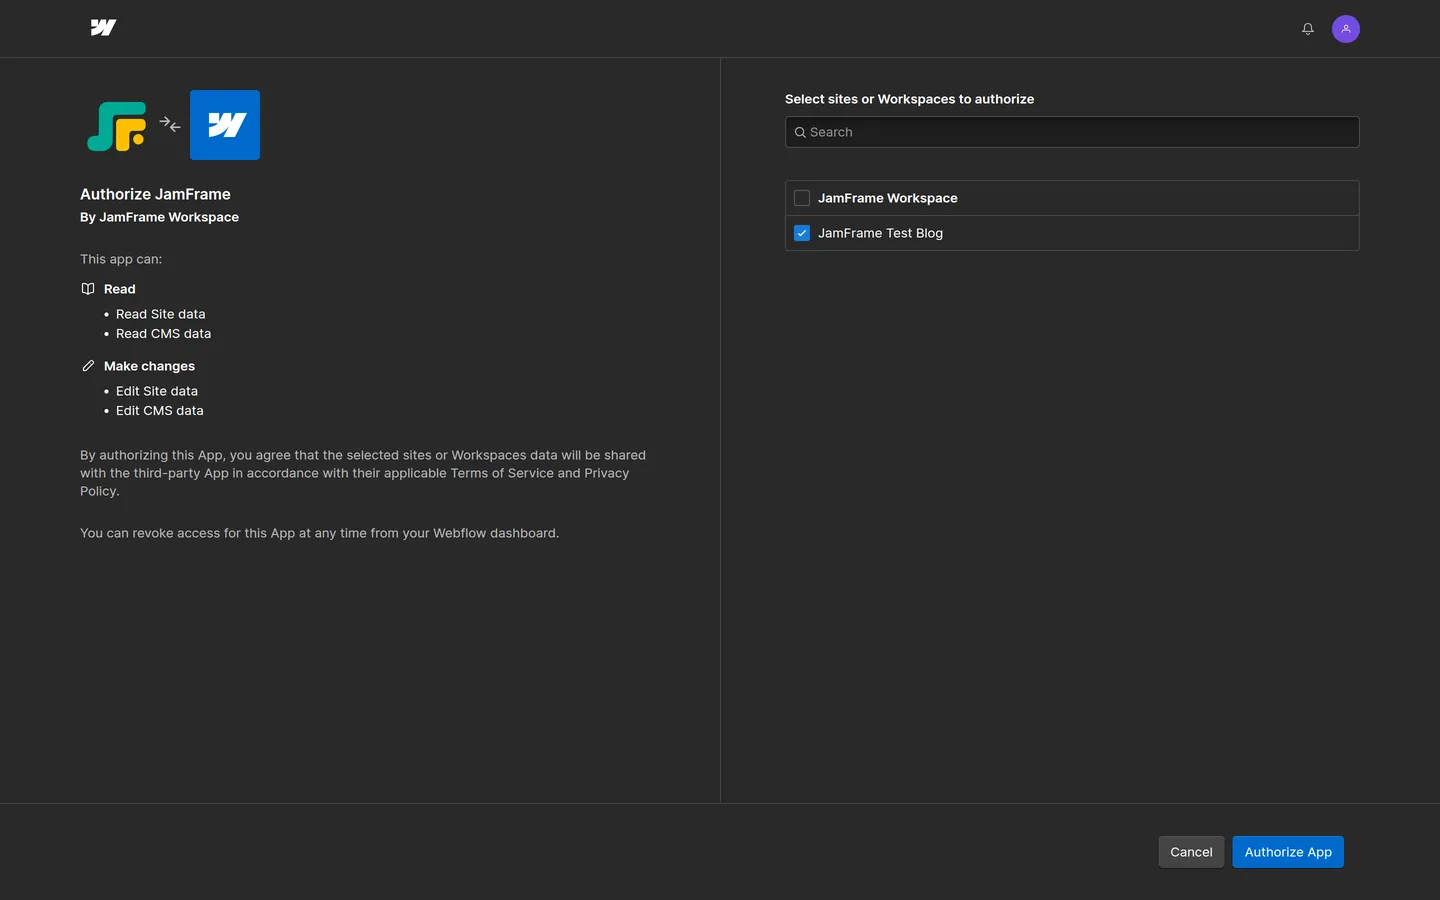
You choose which sites JamFrame can reach, on Webflow's screen. -
You’re back in JamFrame, which says Webflow is connected.
To add sites later, click Connect another site. If you click Cancel on Webflow’s screen, nothing is connected and JamFrame says the connection was cancelled.
Add a collection
- Click Add a collection.
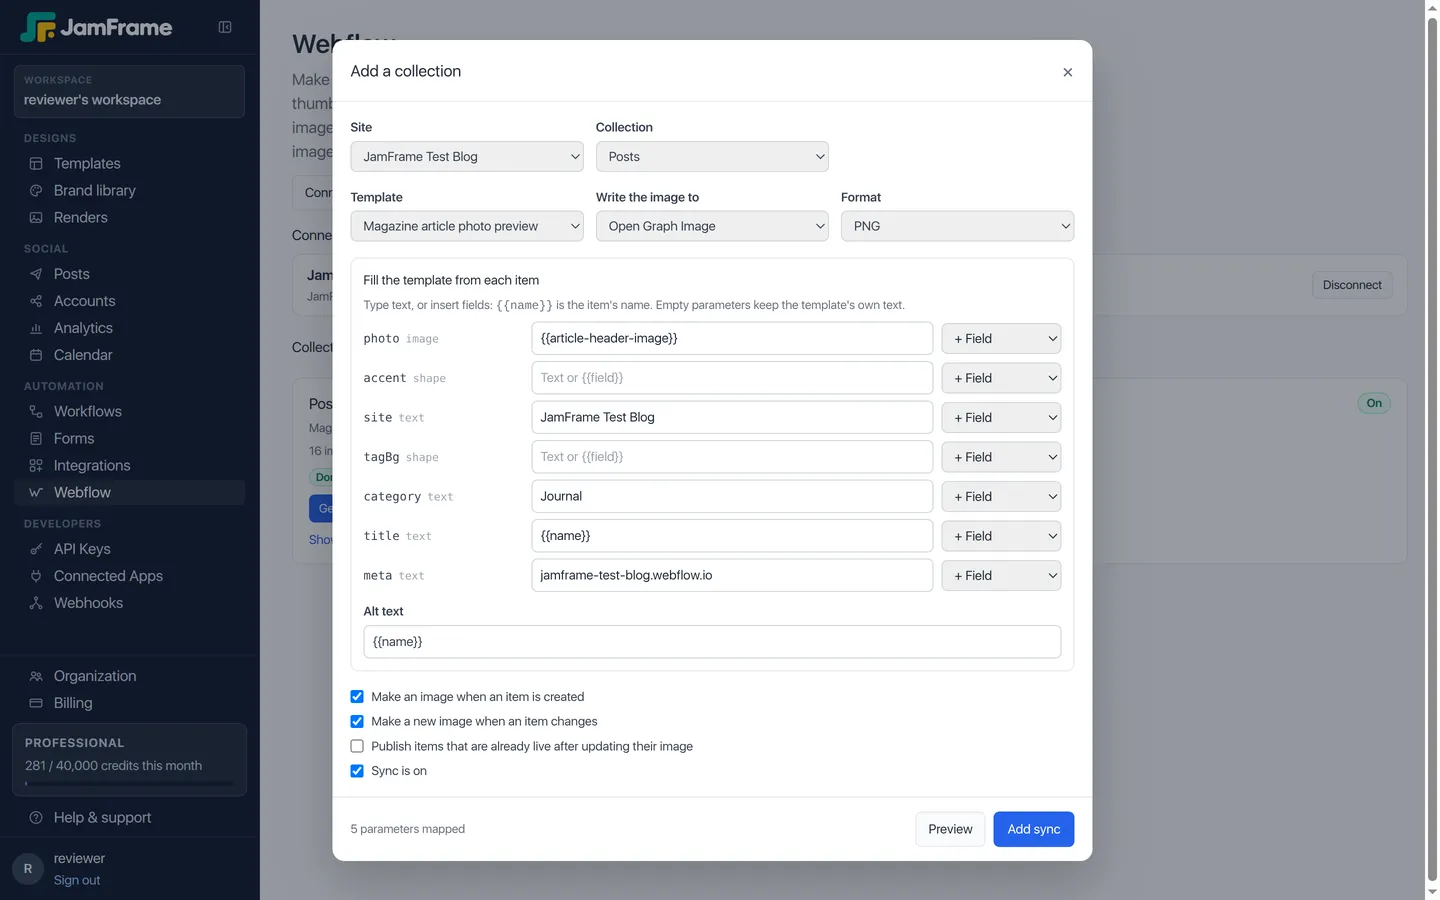
- Choose the Site and the Collection.
- Choose the Template, the Image field to Write the image to, and the Format (PNG, JPEG or WebP). JamFrame suggests a field whose name says it’s for sharing, such as “Open Graph Image”. Check it’s the field you meant.
- Under Fill the template from each item, give each field of the template a value. Type text, or pick an
item field from + Field to insert it, such as
{{name}}for the item’s name. You can mix both, for exampleNew on the blog: {{name}}. A field you leave empty keeps the template’s own text. - Alt text is the image’s description in Webflow. It starts as
{{name}}. - Choose what happens later:
- Make an image when an item is created
- Make a new image when an item changes
- Publish items that are already live after updating their image (see Publishing)
- Sync is on: untick it to pause the collection.
- Click Preview to see what the first items would fill in. Nothing is made yet, and no credits are used.
- Click Add sync.
Make the images
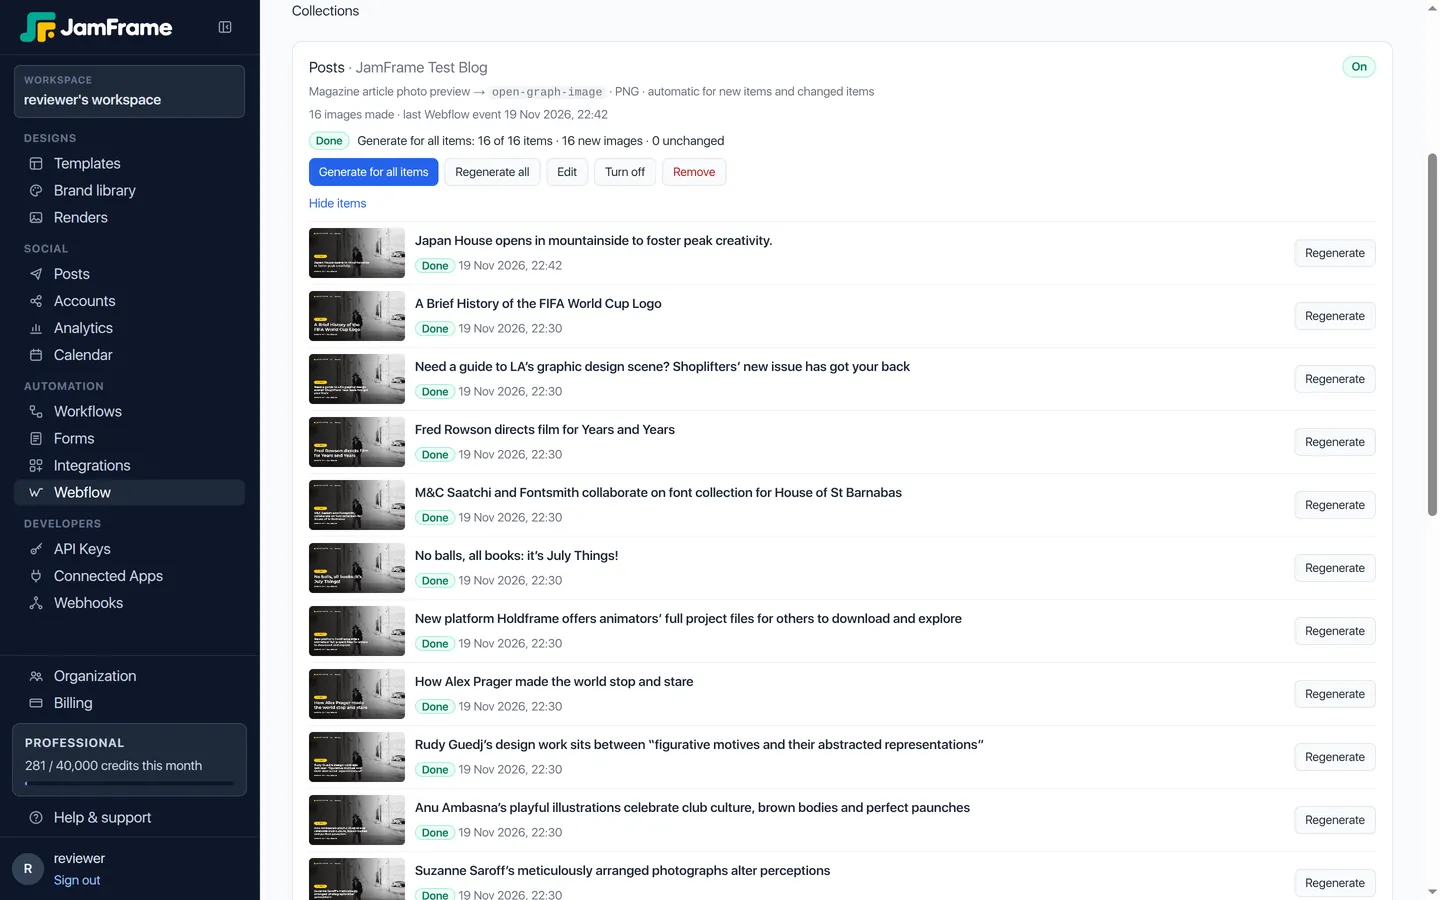
On the collection’s card, click Generate for all items. JamFrame makes an image for each item and saves it in Webflow, and the card shows the progress. Items whose values haven’t changed since their last image are skipped, so running it again costs nothing for them. Regenerate all makes every image again, even for items that didn’t change, for example after you change the template. Click Show items and history to see each item with its image, and the latest runs.
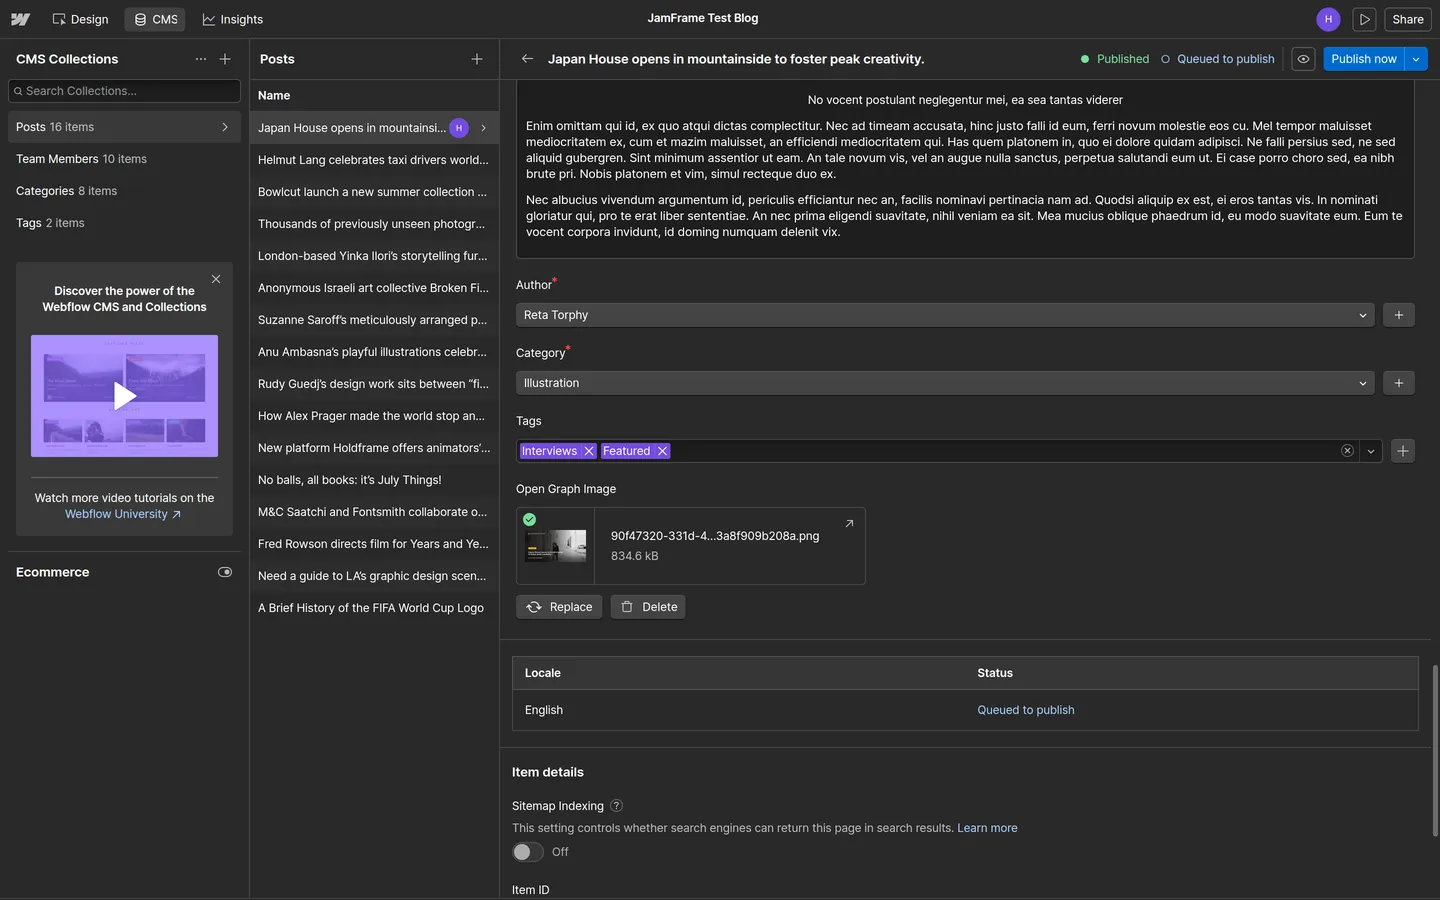
In Webflow, each item now has its image in the field you chose.
New and changed items
When you add an item, or change one, Webflow tells JamFrame, and the new image is there within about a minute. JamFrame only makes a new image when a field the template uses has changed: editing a field you didn’t map costs nothing. Saving the image to the item doesn’t start another round either.
Publishing
- Off (the default): the item gets its new image as a change waiting to be published. It goes live the next time you publish the site in Webflow.
- On: items that are already live are published right after their image is saved, so the new image is live at once. Drafts and items that were never published stay as they are.
Which fields can fill the template
| Webflow field | What JamFrame uses |
|---|---|
| Plain text, Link, Email, Phone, Number | The value |
| Rich text | The text, without its formatting |
| Date | The date written out, such as October 2, 2026 |
| Option | The option’s name |
| Switch | Yes or No |
| Image, Multi-image, File | The file’s URL (the first one for Multi-image). Use it for an image in your template. |
| Reference, Multi-reference | The referenced items’ IDs, not their names |
Credits and limits
- Each image uses one render credit, on every plan. A render that fails costs nothing.
- Webflow accepts images up to 4 MB. If a PNG comes out bigger, choose JPEG.
- Webflow limits how many requests an app can send each minute, so JamFrame spaces its calls out. A large collection takes a few minutes. If Webflow asks JamFrame to slow down, the card says when work continues.
Disconnect or remove the app
- In JamFrame: click Disconnect next to the connection. JamFrame removes its webhooks from your site, gives up its access to Webflow, and removes the collections set up for it. Images already in Webflow stay. Webflow may still list JamFrame under the site’s connected apps until you uninstall it there.
- In Webflow: open the site’s settings, then Apps & Integrations. Under Connected Apps, click View details next to JamFrame, then Uninstall App. JamFrame deletes its access to that site the next time it tries to reach it, and the Webflow page in JamFrame shows Reconnect.
Need help?
Email [email protected] with the site, the collection and what JamFrame showed.
Last updated
Still stuck?
Email [email protected] and a real person will reply. Tell us the template you were using and what you expected to happen.